Project Panel View Settings: Difference between revisions
No edit summary |
No edit summary |
||
| Line 211: | Line 211: | ||
'''Tag Colour Width:''' | '''Tag Colour Width:''' | ||
Sets the size of the 'Tag Colour' overlay, a thick framing | Sets the size of the 'Tag Colour' overlay, a thick framing border useful in visually distinguishing between Panels with different purposes. | ||
Adjusting the slider and value will set the boarder's size as a percentage of the total Canvas area. | Adjusting the slider and value will set the boarder's size as a percentage of the total Canvas area. | ||
| Line 218: | Line 218: | ||
'''Tag Colour Opacity:''' | '''Tag Colour Opacity:''' | ||
Sets the | Sets the opacity of the 'Tag Colour' overlay, a thick framing border useful in visually distinguishing between Panels with different purposes. | ||
Latest revision as of 23:46, 12 November 2020
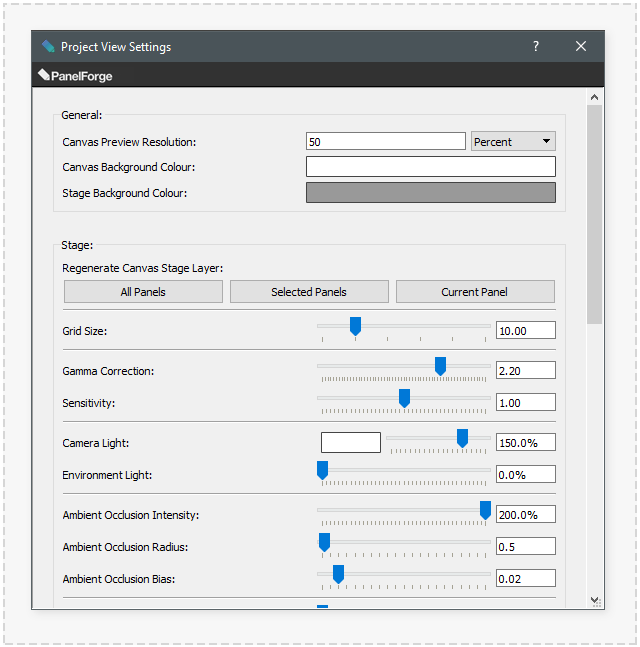
The 'Project Panel View Settings' window provides the options to adjust many visual setting that will be used throughout the current Project. Most options will produce instant visual feedback. Where options require regeneration of certain data this process will be described.
This settings window can be accessed via the 'Project->Project Settings->Panel View...' main menu item when a Project is open in PanelForge.
Any changes made to settings in this window are not undoable. It may be advisable to create an archived copy of the current project when regeneration of a large amount of data is required.
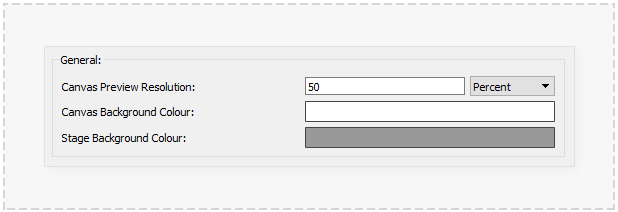
General
The following options apply to many areas of a PanelForge Project. It is advised to adjust these options first after creating a 'New Project' to avoid data having to be regenerated:
Canvas Preview Resolution:
The resolution used for each Panel's preview in various PanelForge user interface elements. These include the Panel preview during 'Playback' or 'Scubing' of the Project timeline and Panel 'Thumbnail' previews used in the 'Panel Timeline' and 'Panel Thumbnails' Palettes.
- Under normal circumstances, the default of '50%' should not be modified.
Canvas Background Colour:
The colour used as the background for the Panel's Canvas view and any corresponding exports of the Panel's Canvas. Clicking on the colour box will display a 'Colour Picker' Window.
- Changing this colour will not cause the existing Panel Canvas Previews to be updated.
Stage Background Colour:
The colour used as the background for the Panel's Stage viewport interface, this has no effect on the export of the Stage data to the Canvas 'Stage Layer'.
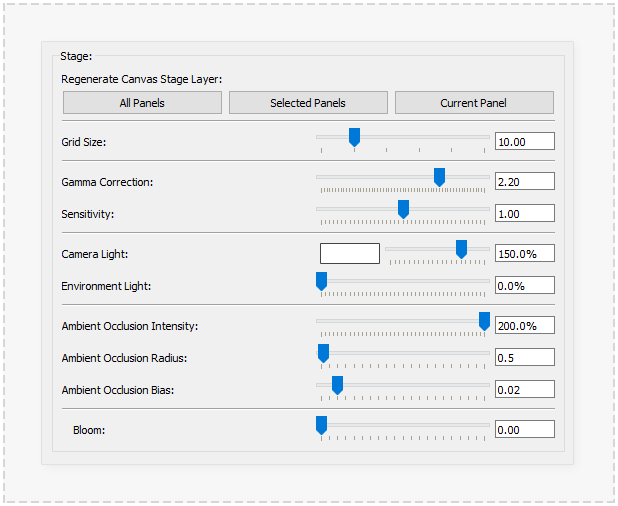
Stage
The following options apply to the Stage portion of Panels in a PanelForge Project. It is advised to adjust these options early after creating a 'New Project' to avoid data having to be regenerated:
Regenerate Canvas Stage Layer:
These buttons when pressed will cause the indicated Panels 'Canvas Stage Layers' to be regenerated. This functionality can be used to apply changes made in the below settings to be updated across multiple Panels.
Grid Size:
The size of the 'Grid' guide ornament optionally visible in the Stage viewport. The size value unit is the same as the view Stage units.
Gamma Correction:
Used in the Stage viewport's 'High Quality' mode and the 'Canvas Stage Layers.
Adjusts the objects illumination output to be correct with the monitors colour response gamma curve. Almost all modern Computer and Television systems use a 'Gamma' curve value of '2.2'.
This value may be adjusted for ascetic reasons, but under normal circumstances, it is not recommended.
- Changing this value will not cause the existing Panel 'Canvas Stage Layers' to be updated. Use the above 'Regenerate Canvas Stage Layer' to update Panels.
Sensitivity:
Used in the Stage viewport's 'High Quality' mode and the 'Canvas Stage Layers.
A 'Brightness' adjustment of the stage view before the 'Gamma Correction is applied.
This value may be adjusted for ascetic reasons, but under normal circumstances, it is not recommended.
- Changing this value will not cause the existing Panel 'Canvas Stage Layers' to be updated. Use the above 'Regenerate Canvas Stage Layer' to update Panels.
Camera Light:
Used in the Stage viewport's 'Fast Quality' and 'High Quality' modes and the 'Canvas Stage Layers.
The 'Camera Light' is a directional light which is cast from the camera's viewing direction. This 'default' Stage light can be disabled within each Panel via a Camera's 'Camera Light' Object attribute. The 'Camera Light' is provided as a convenience. When no custom light objects are present in a Stage, the geometry objects would be shaded completely black.
Clicking the colour box will display a 'Colour Picker' window. The slider and percentage value control the lights 'brightness/strength'.
- Changing this value will not cause the existing Panel 'Canvas Stage Layers' to be updated. Use the above 'Regenerate Canvas Stage Layer' to update Panels.
Environment Light:
Used in the Stage viewport's 'High Quality' mode and the 'Canvas Stage Layers.
Applies additional lighting with an image-based environment dome. This image is fixed to a blue cloudy sky.
- Changing this value will not cause the existing Panel 'Canvas Stage Layers' to be updated. Use the above 'Regenerate Canvas Stage Layer' to update Panels.
Ambient Occlusion Intensity:
Used in the Stage viewport's 'High Quality' mode and the 'Canvas Stage Layers.
The intensity of a 'Screen Space' Ambient Occlusion effect that gives the illusion of realistic subtle shadowing when objects are close to each other.
- Changing this value will not cause the existing Panel 'Canvas Stage Layers' to be updated. Use the above 'Regenerate Canvas Stage Layer' to update Panels.
Ambient Occlusion Radius:
Used in the Stage viewport's 'High Quality' mode and the 'Canvas Stage Layers.
The maximum size of the Ambient Occlusion effect in Stage units.
- Changing this value will not cause the existing Panel 'Canvas Stage Layers' to be updated. Use the above 'Regenerate Canvas Stage Layer' to update Panels.
Ambient Occlusion Bias:
Used in the Stage viewport's 'High Quality' mode and the 'Canvas Stage Layers.
The threshold of when the Ambient Occlusion effect will be visible. Reducing this value will increase the intensity of the effect.
- Changing this value will not cause the existing Panel 'Canvas Stage Layers' to be updated. Use the above 'Regenerate Canvas Stage Layer' to update Panels.
Bloom:
Used in the Stage viewport's 'High Quality' mode and the 'Canvas Stage Layers.
When an area of geometry object's lighting has exceeded the brightness of pure white an overexposure blurring effect will be shown in the corresponding area.
- Changing this value will not cause the existing Panel 'Canvas Stage Layers' to be updated. Use the above 'Regenerate Canvas Stage Layer' to update Panels.
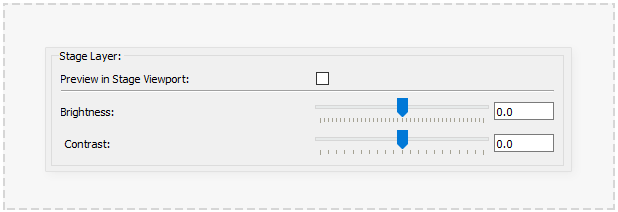
Stage Layer
The following options apply to the Stage portion of Panels in a PanelForge Project. It is advised to adjust these options early after creating a 'New Project' to avoid data having to be regenerated:
Preview in Stage Viewport:
Used in the 'Canvas Stage Layers'.
Whether the below options should be also visible during the Stage viewport's 'High Quality' mode.
Brightness:
Used in the 'Canvas Stage Layers'.
Adjusts the output 'Brightness' of the 'Canvas Stage Layers'. Useful to create a more 'subdued' effect.
- Changing this value will not cause the existing Panel 'Canvas Stage Layers' to be updated. Use the above 'Regenerate Canvas Stage Layer' to update Panels.
Contrast:
Used in the 'Canvas Stage Layers'.
Adjusts the output 'Contrast' of the 'Canvas Stage Layers'. Useful to create a more 'subdued' effect in conjunction with the above 'Brightness' option.
- Changing this value will not cause the existing Panel 'Canvas Stage Layers' to be updated. Use the above 'Regenerate Canvas Stage Layer' to update Panels.
Overlays
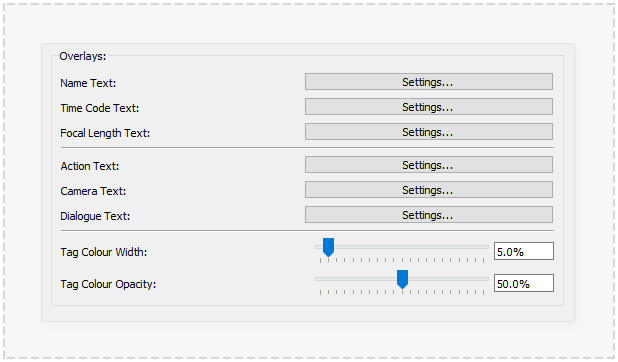
Adjust how the overlay elements are displayed in the Canvas, Stage (Panel Camera) and various Export file types:
Name Text:
Pressing the 'Settings...' button will show a window with various options for how the 'Panel Name' overlay text will be displayed.
Time Code Text:
Pressing the 'Settings...' button will show a window with various options for how the 'Panel Time Code' overlay text will be displayed.
Focal Length Text:
Pressing the 'Settings...' button will show a window with various options for how the 'Panel Focal Length' overlay text will be displayed.
Action Text:
Pressing the 'Settings...' button will show a window with various options for how the 'Panel Focal Length' overlay text will be displayed.
Camera Text:
Pressing the 'Settings...' button will show a window with various options for how the 'Panel Focal Length' overlay text will be displayed.
Dialogue Text:
Pressing the 'Settings...' button will show a window with various options for how the 'Panel Focal Length' overlay text will be displayed.
Tag Colour Width:
Sets the size of the 'Tag Colour' overlay, a thick framing border useful in visually distinguishing between Panels with different purposes.
Adjusting the slider and value will set the boarder's size as a percentage of the total Canvas area.
Tag Colour Opacity:
Sets the opacity of the 'Tag Colour' overlay, a thick framing border useful in visually distinguishing between Panels with different purposes.
Guides
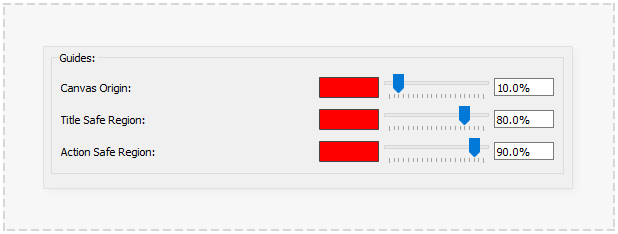
Adjust how the guide elements are displayed in the Canvas, Stage (Panel Camera) and various Export file types:
Canvas Origin:
Sets the colour and size of the 'Canvas Origin', a cross placed in the centre (Vertically and Horizontally) of the Canvas area.
Clicking the colour box will display a 'Colour Picker' window to set the Origin's colour. Adjusting the slider and value will set the Origin's size as a percentage of the total Canvas area.
Title Safe Region:
Sets the colour and size of the 'Title Safe Region', an inner framing box defining a safe area to show text elements.
Clicking the colour box will display a 'Colour Picker' window to set the Region box's colour. Adjusting the slider and value will set the Region box's size as a percentage of the total Canvas area.
Action Safe Region:
Sets the colour and size of the 'Action Safe Region', an Outer framing box defining a safe area to perform story elements (traditionally a television partially cropped this area from view).
Clicking the colour box will display a 'Colour Picker' window to set the Region box's colour. Adjusting the slider and value will set the Region box's size as a percentage of the total Canvas area.
